
Create Azure Ubuntu VM, install MySQL and remote access it.
The purpose of this post is to provide a clean and easy step-by-step way of how you can create a Ubuntu VM using Azure and then install a MySQL Database Server and showing how to access to it.
Create the Ubuntu VM using Azure
Step 1.
First we need to choose the type of server that the VM is going to run, in this case we will be using Ubuntu Server, don’t mind the version for now since it will be irrelevant for the purpose of this demo.
Follow the flow to create the Ubuntu Server VM.
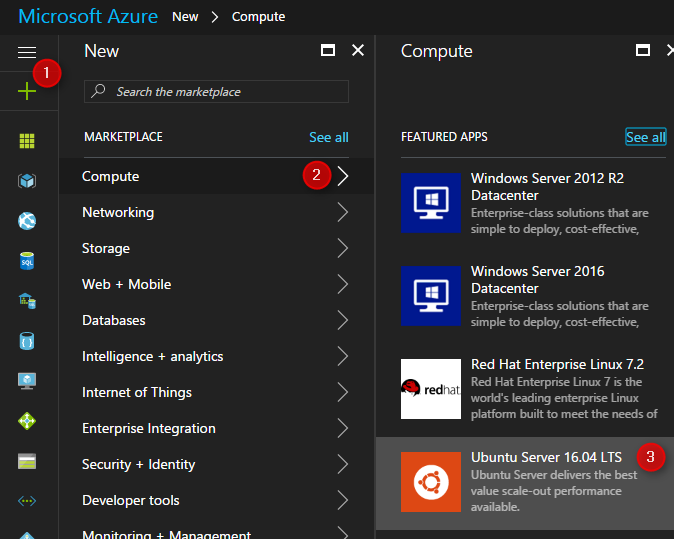
Press create to insert the information about the VM.

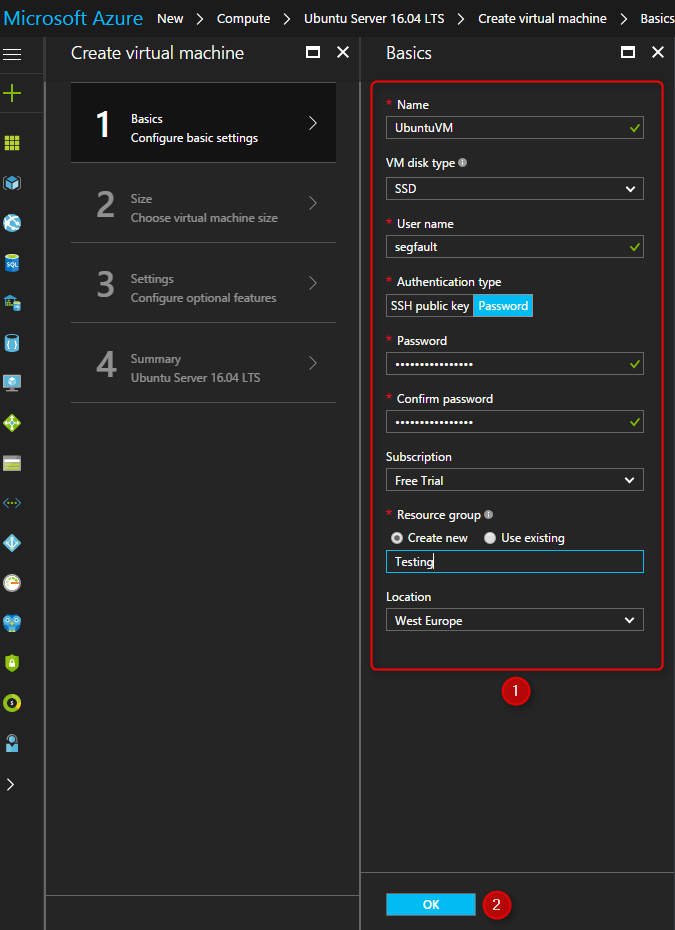
Step 2.
In the second step we will be choosing the information and features of the VM we want.
Fill the info about the VM, namely the User name, Password and Resource group.
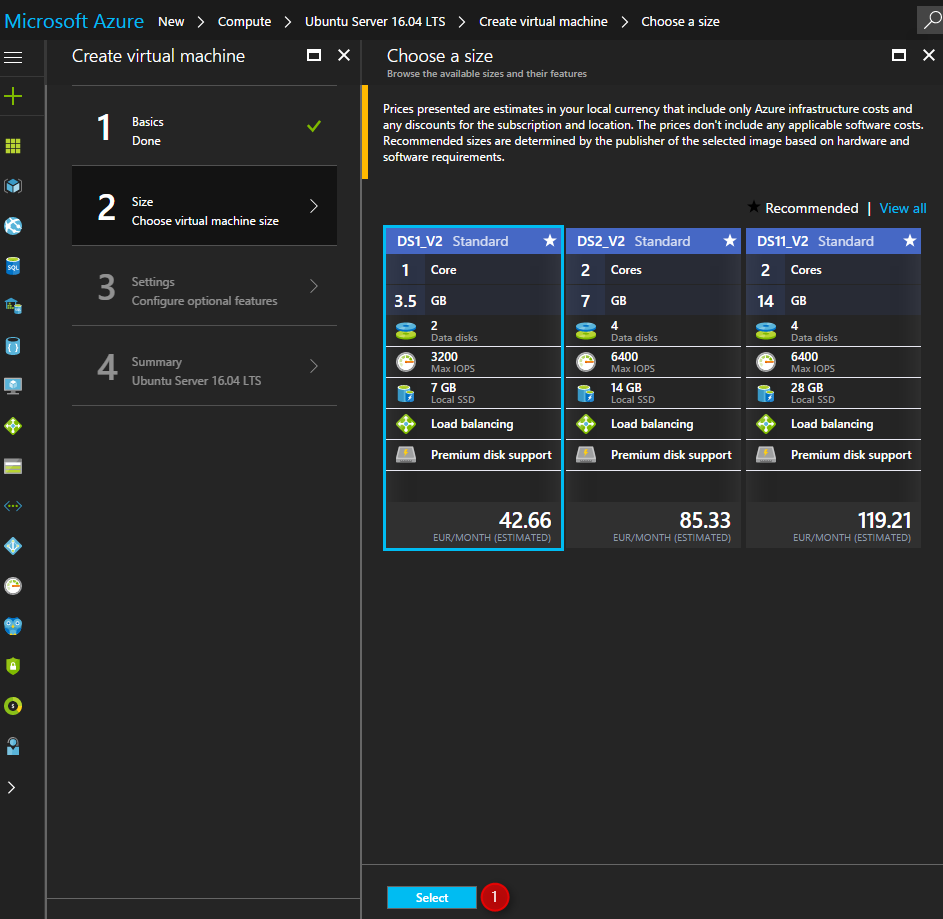
Choose the size of the VM and its features.
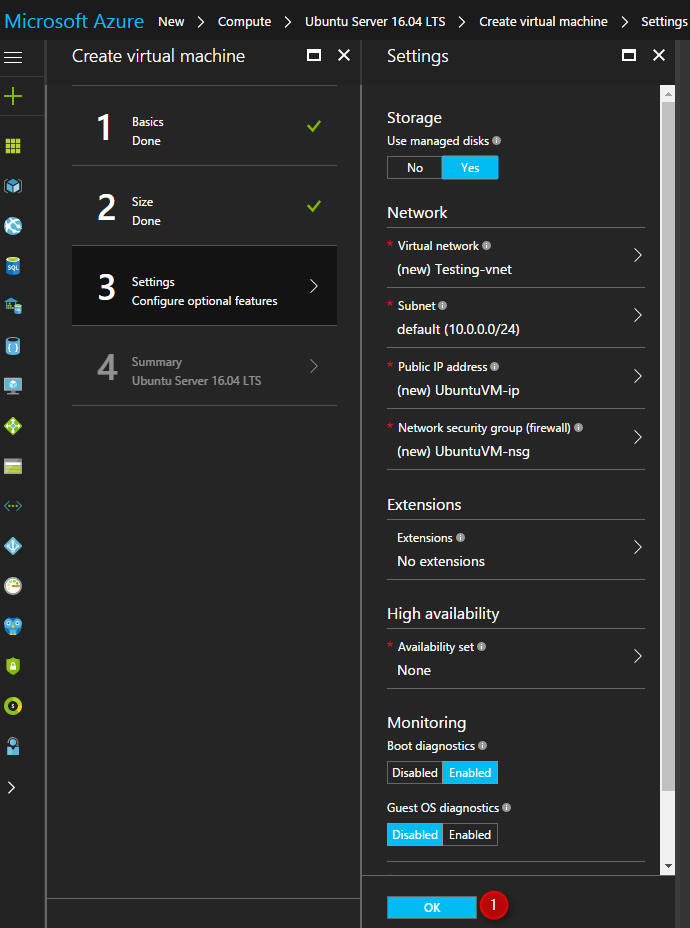
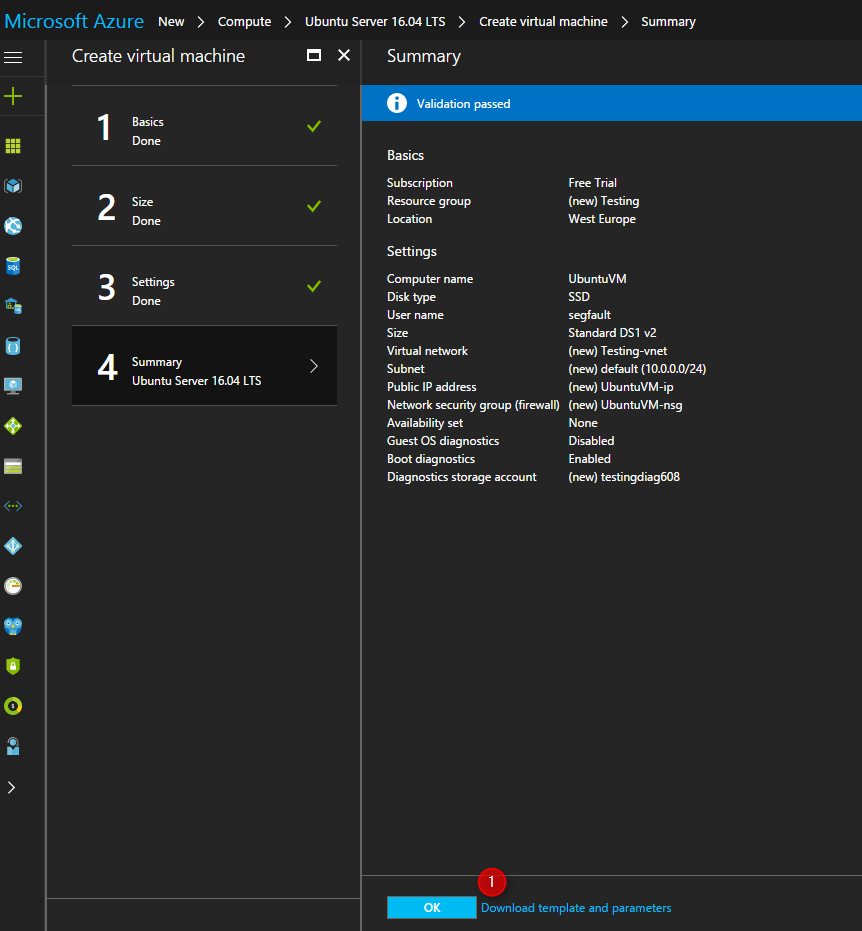
For the settings and optional features, just leave the default values. You can see the Virtual network value is according to the Resource Group we chose. Press OK to continue.
Verify the options and then press Ok to create the VM.
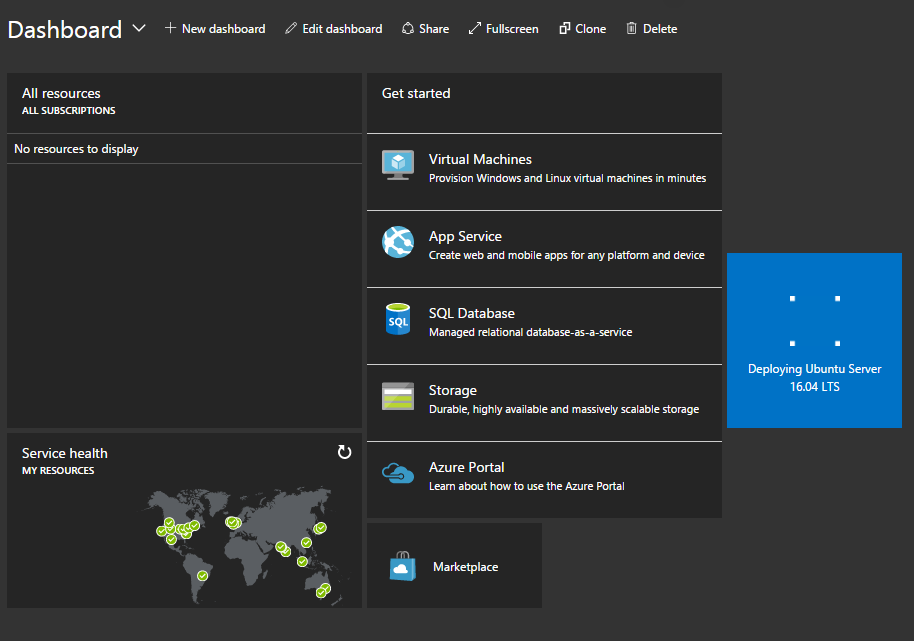
Wait while Azure deploys the VM with the characteristics that we chose.
Step 3.
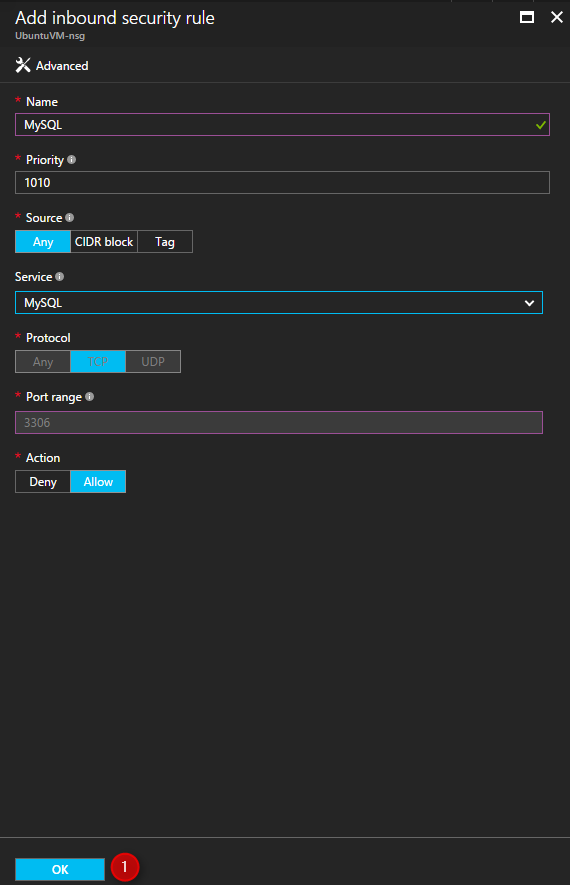
In this step we will have to create a rule so that we can access remotely to MySQL Server, I will show you how you can create an Inbound rule in this case.
Select the Resource group we created in Step 2.
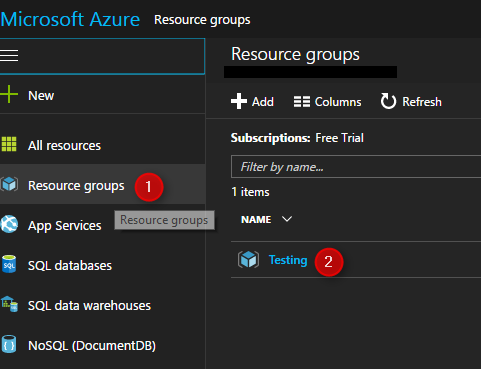
Navigate to the item of type Network security group.

There add a new inbound rule.
Choose the Service MySQL, this should fill the Port range, and press Ok.
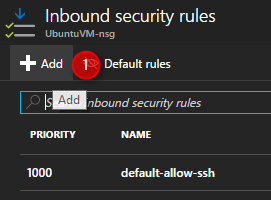
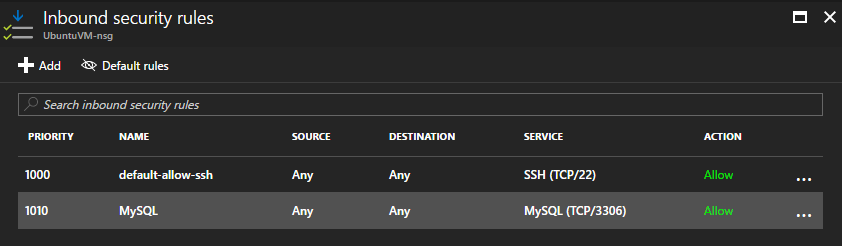
Confirm that your list looks like this one.
Installing and configuring MySQL Server via SSH
Step 1.
In this step we will be accessing the Ubuntu Server VM via SSH.
Confirm the the credentials to connect via SSH to the VM
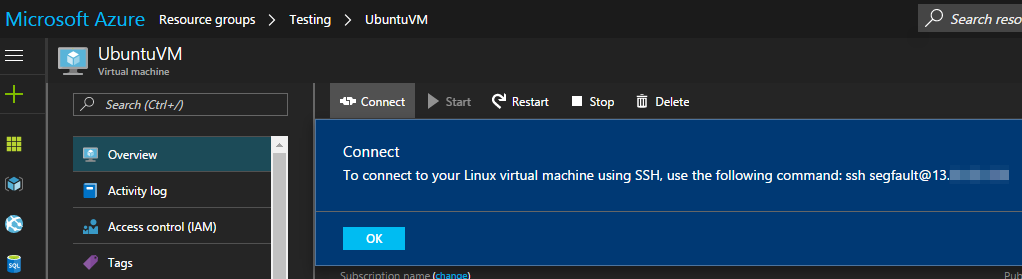
In this case we will be using Putty to connect to the VM. Fill the IP address with the one you got in the previous image and fill in the password given when creating the VM.

You can get Putty from here.
Step 2.
Now we are connected to the VM. The first thing is to switch to root so that we can install the MySQL Server. After inserting the password run the other commands listed bellow.
sudo su -
apt-get update
apt-get -y install mysql-server-5.7
While installing the MySQL Server you will be prompt, if everything is according to plan, with a screen to introduce a password, this will be your MySQL Server password for the root user.

In the end you can check if MySQL Server is running by executing the following command, still in Putty:
service mysql status
And you should be able to see the info about the service running MySQL.

After checking the status of the service we should try to connect to the MySQL Server. You can login to MySQL by running the following instruction:
mysql -uroot -p
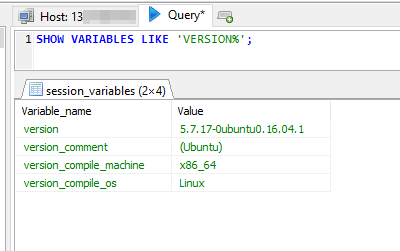
After being prompted for the password you can query the database so check if indeed everything is working.
SHOW VARIABLES LIKE 'version%';
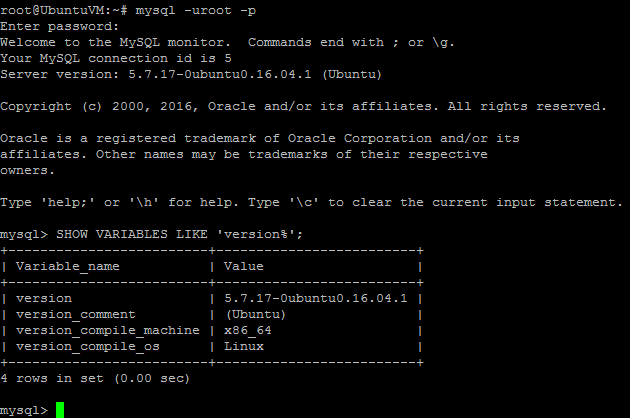
You should see on the screen the info about MySQL Server version. Don’t close the connection, we will need in the next step.
Step 3
After having MySQL Server running we can try to access it with our favorite SQL Client, you can use HeidiSQL just because it is portable and very lightweight and serves our purposes in this tutorial.
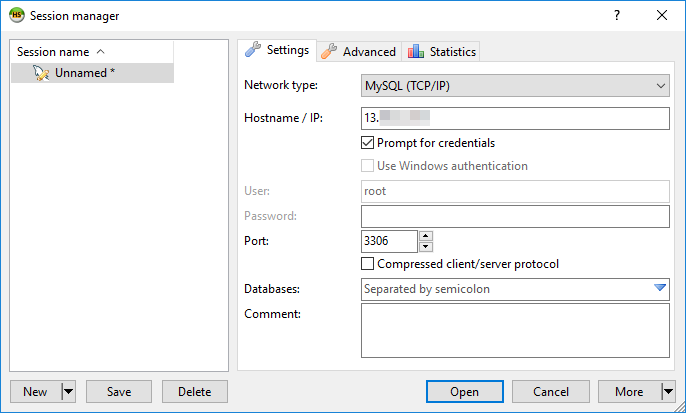
We will encounter a problem.
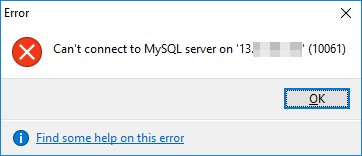
We still haven’t authorize remote access to the MySQL Database Server. To do that we will need to edit the configuration file, still using the SSH connection we used earlier.
sudo vi /etc/mysql/mysql.conf.d/mysqld.cnf
In the file we will find the property bind-address and replace the localhost with the address 0.0.0.0 so it will accept all addresses.


Hopefully this will led to the search of a few commands on how to search and save a file using vi ![]() .
.
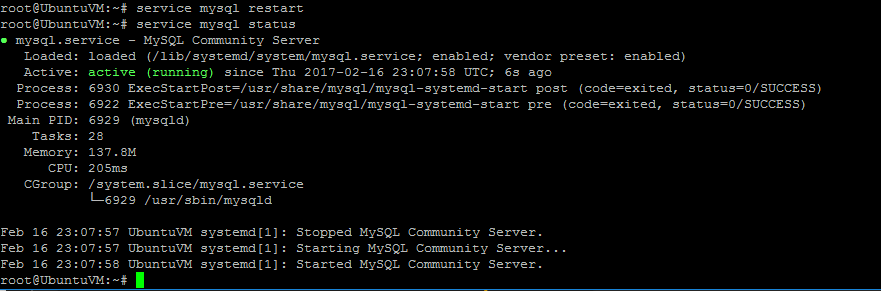
After closing the file we will need to restart the MySQL service using the command, still using Putty, as shown in the following image:
service mysql restart
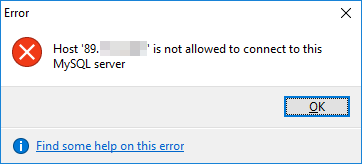
Now that we have allowed MySQL Server to accept connections from any IP we still have to grant remote access to the previous created root user. If we don’t do that and try to connect anyway we will get the following error:
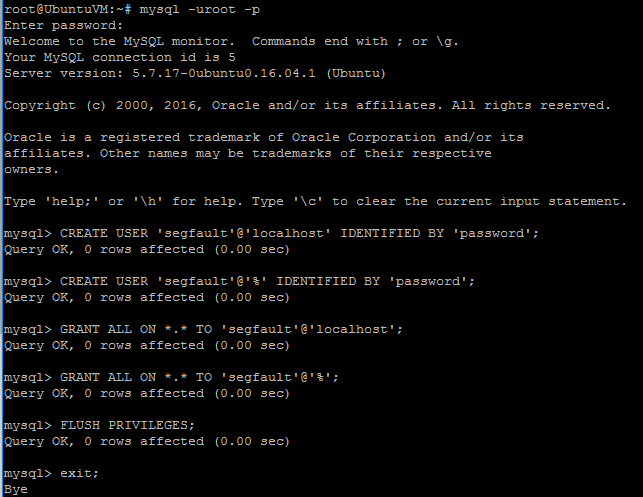
Instead of just granting access to the root user I will show you the process of creating a user and granting access to it. Use the following commands in the SSH session to login using the root user and insert the password:
mysql -uroot -p
Then proceed to create a user. In the example I will create a user called segfault, first with the hostname from where it can connect being the localhost and after that using a wild card % to allow connections from every host.
With the users created it is time to grant access to them. Bare in mind the they are different users, with different passwords, so we will need to grant them both access.
After granting access just use “flush” for the changes to take place.
And voila, you can try to access using a SQL Client and execute some query to be sure all is working.

Leave a Comment